This topic is for first time installation, for updating Mill7Mobile please see the following topic: Updating Mill7Mobile
1.Download the latest version of Mill7Mobile from our website
2.Start the installer and choose the correct path (by default: c:\inetpub\Mill7Mobile)
3.After the installation is completed the installer of "Dataflex 2017 web application" will be started.
4.In the first phase of the installer the “webappcheck” can be used to check if everything in Windows is set up correctly for the webapp to run correctly.
IIS ASP Classic needs to be installed.
![]()
If this isn’t installed you can use windows features to install it.

32-bit Application support does not need to be enabled with version 19.0
This needs to be enabled, please click on the info button for instructions.
Non-interactive desktop heap size needs to be enough.
![]()
You can increase the size by editing the following registry setting:
HKEY_LOCAL_MACHINE\System\CurrentControlSet\Contro l\Session
Manager\SubSystems\Windows
Make sure you increase the third value after “Windows SharedSection” to a minimum of 3072
Example: “Windows SharedSection=1024,12288,3072”
After the webappcheck doesn’t give any errors anymore you can continue the installer.
5.After the first phase you will see a button Register, do not use this and continue to the next phase of the installer.
6.After this phase is completed close the installer.
7.You will now be asked to restart the server, please press "Yes", this is really needed.
8.Go to the start menu and start the program “Web application administrator”
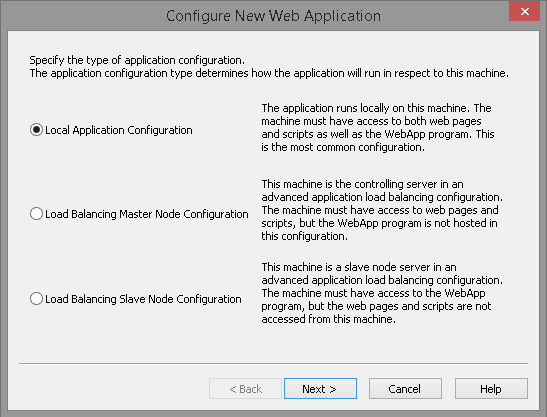
9.Click “file” > “Configure new web application”
In the first screen select: Local Application Configuration

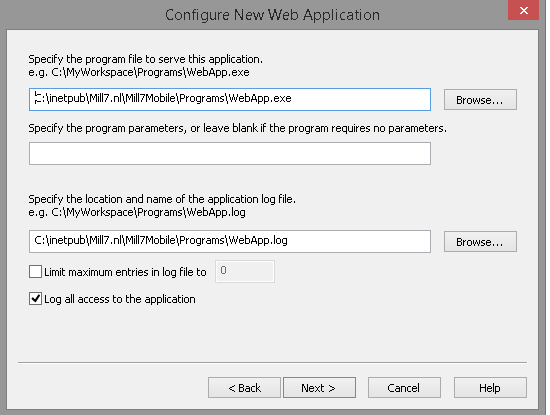
Then specify the program file “Webapp.exe” in the second screen:

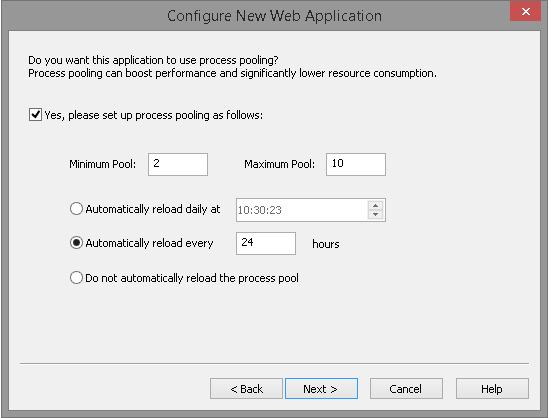
In The third screen process pooling should be enabled (this makes the Web Application a lot faster)

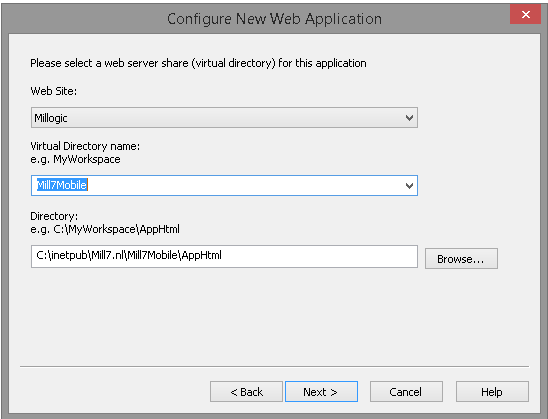
In the next screen the web site should be chosen where the application is added to. The website needs to be set up in IIS.

After pressing “next” button a summary screen will be shown and press “finish”.
10.The installation is ready, please see the configuration section for settings that need to be applied.